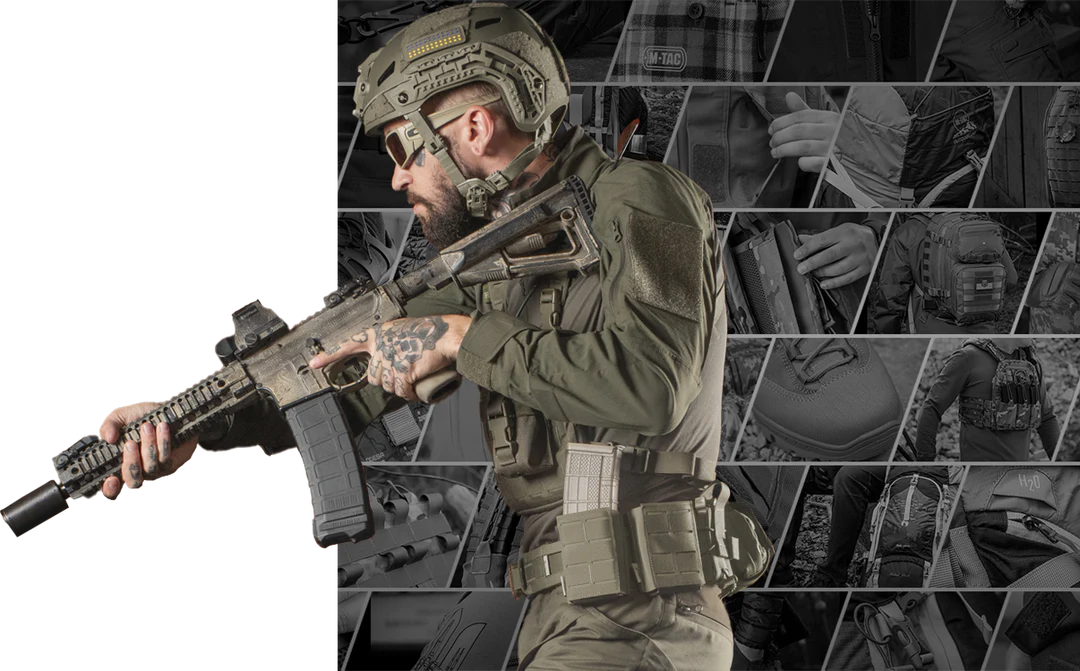
A chest rig is one of those pieces of gear that looks simple until you actually have to use it. Strap it on wrong, load it up without a plan, and you end up with a rig that shifts when you run, digs into your hips when you drive, and slows down your reload when it matters most. Get it right, and it almost disappears — your gear is exactly where you need it, your movement stays unrestricted, and your loadout works with you instead of against you.
This guide covers how to set up a chest rig properly: what goes where, how to fit it to your body, and the mistakes that trip up most people the first time around.

Brief History: What Are Chest Rigs and Where Did They Come From
A chest rig is a load-bearing harness worn on the upper torso. Its job is gear management, not protection. It holds magazines, medical supplies, and mission-critical tools in a way that keeps them accessible without adding unnecessary bulk.
The modern tactical chest rig did not appear overnight. Its roots go back to the Rhodesian chest rig of the 1970s, a simple canvas carrier developed out of necessity by Rhodesian soldiers who needed a lightweight way to carry magazines without the bulk of traditional webbing. That basic concept spread through special operations communities over the following decades. During the Global War on Terror, as plate carriers became standard and armor systems evolved, chest rigs found a new role: worn independently for mobility-focused operations, or layered over body armor for additional carrying capacity. The Ranger Assault Carrying Kit, known as the RACK, was among the first modern versions to see widespread use and largely shaped what most people think of when they picture a tactical chest rig today.
That brief history matters because it explains the design logic. Chest rigs were built by people who needed to move fast and access gear under pressure. Every element of a good setup reflects that.
Chest Rig vs Plate Carrier: Knowing the Difference
Unlike a plate carrier, a chest rig does not accommodate ballistic armor. That is the fundamental difference between the two. A plate carrier protects you. A chest rig equips you.
Because there are no heavy armor plates involved, a chest rig is lighter, cooler to wear, and allows a greater range of movement. For range training, hunting, or any situation where mobility matters more than ballistic protection, it is often the more practical choice. When the threat level demands stopping rounds, a plate carrier becomes necessary.
Some setups run both together, mounting a chest rig over a plate carrier for additional carrying capacity, though this adds bulk and requires careful planning to avoid interference between the two. If you go that route, keep the chest rig slim and make sure nothing on it conflicts with the plate carrier's shoulder straps or cummerbund.
The choice comes down to your mission. Know what you need before you build your loadout.
Chest Rig Set Up Starts With Your Mission, Not Your Gear
The single biggest mistake people make when setting up a chest rig is starting with the pouches instead of starting with the purpose. Before you attach anything, ask yourself what you are actually doing with this rig.
A range day setup looks different from a hunting configuration. A vehicle-based loadout differs from one built for extended foot movement. If you are running a heavy ruck, your chest rig needs to stay clear of the pack's shoulder straps and hip belt, which means keeping the setup slim and the weight forward. If you are spending time in a vehicle, a chest-mounted system keeps your waist clear and your gear reachable while seated, something a battle belt cannot always offer in that position.
The fighting load, meaning everything you carry on your person that directly contributes to your ability to function, should be lean by default. A chest rig is not a backpack. The more you pile onto the front panel, the harder it becomes to get into prone position, move through tight spaces, and manage your weapon. Special operations units run compact rigs for a reason. They do not double-stack pouches. They do not carry what they do not need. That principle applies whether you are military, law enforcement, or a civilian shooter.
Build your rig around what you will actually use. Everything else goes in an assault pack, on a battle belt, or gets left behind.
Modular Chest Rig Setup: Understanding MOLLE
Most modern chest rigs use MOLLE webbing, which stands for Modular Lightweight Load-carrying Equipment. It is the grid of one-inch nylon channels running across the front panel and sides of the rig. Pouches attach by weaving their connection straps through these channels and securing them with snaps or friction locks on the back.
The modular chest rig design gives you real flexibility, but it requires a plan. Before attaching anything permanently, lay out your intended configuration and think through the placement. MOLLE is modular by design, but it is not effortless to reconfigure once everything is threaded in. Planning ahead saves you from pulling it all apart later.
The front panel is your prime real estate. Treat it accordingly.
Magazine Pouches: The Foundation of Any Chest Rig Loadout
Rifle magazine pouches belong at the center and front of the rig. This is the most accessible real estate on the entire platform, and magazines are what you will reach for most under pressure.
Placement should support a natural, efficient reload motion. For a right-handed shooter, magazines are drawn with the left hand, so pouches should sit where the left hand can reach them without crossing the body or losing control of the weapon. Angled pouches, canted slightly toward your centerline, make the draw more ergonomic and reduce the chance of fumbling under stress.
Retention matters. A pouch that dumps your magazines when you sprint is useless. Use inserts or pouches with bungee retention, Kydex inserts, or adjustable closures that keep mags secure during movement but allow smooth, clean draws when you need them.
Platform compatibility is not optional. AR and AK magazines differ significantly in size and curvature. A pouch built for AR mags will not properly retain AK mags. Most standard three-magazine panels designed for AR-style mags can only fit two AK mags due to the wider body and curved profile of AK magazines. If you are running an AK platform, verify your pouches before you build around them.
Pistol magazines are generally better placed on a battle belt if you are running one. They are smaller and lighter, and positioning them at the waist puts them at a natural hand-drop location while keeping your chest panel less cluttered.

IFAK: Non-Negotiable
Every serious chest rig loadout includes an Individual First Aid Kit. There is no scenario where this is optional. Gunshot wounds, lacerations, and traumatic injuries do not wait for a convenient moment, and having medical gear on your body rather than in a pack means you can get to it when it counts.
The IFAK should be clearly identifiable and reachable with either hand. A common placement is the side panel of the rig or a dedicated dangler pouch below the main front panel. Wherever you mount it, it needs to be accessible under stress, with bloody hands, in low light. Practice opening and deploying it until the motion is automatic.
A small IFAK is better than no IFAK. Keep it stocked with the basics: tourniquet, pressure bandage, chest seal, and hemostatic gauze at minimum. Taking a Stop the Bleed course is a worthwhile investment for anyone running a fighting load.
Admin Pouch, Radio, and General Purpose Pouches
An admin pouch handles small items that do not need to be immediately accessible in a fight but still need to be on your person: maps, batteries, a notepad, a multitool, a small flashlight, or similar admin items. Mount it centrally or behind the magazine row so it does not interfere with reloads.
If you are running a radio, placement should allow you to operate it without removing your dominant hand from your weapon. The non-dominant side of the rig is the standard choice. Routing the cable through the shoulder strap prevents it from snagging. Some setups clip the PTT button directly to a shoulder strap, which keeps it accessible without adding bulk to the front panel.
General purpose pouches for gloves, tools, or small equipment belong on the sides of the rig. Keeping the front panel clean improves your prone profile and your movement through confined spaces. Stacking too much on the front panel is one of the most common setup errors, and it shows the moment someone tries to get flat on the ground.
Getting the Fit Right on Your Chest Rig
This is where most chest rig setups fall apart before they even leave the house.
The rig needs to sit high on the torso. The top of the main panel should align roughly with the notch at the top of your ribcage. Worn too low, the rig becomes a belly rig: it interferes with your belt line, limits hip mobility, and conflicts with anything you are carrying at the waist. Worn correctly, it clears your hips entirely and creates a natural gap between the rig and the ground when you shoot from prone, allowing you to get lower without the gear pushing you up.
Shoulder straps should be tight enough to hold the rig stable and high, but not so tight that breathing becomes restricted. The waist strap or cummerbund secures the rig against your body to prevent it from bouncing or shifting during movement. Loose gear creates noise, slows you down, and wears you out faster than it should.
Once adjusted, test it. Run. Change positions. Get into prone. If the rig shifts, sags, or pulls to one side, dial it in further. A properly fitted chest rig should feel stable and balanced, almost like it is not there.
Common Chest Rig Set Up Mistakes to Avoid
Wearing it too low is the most widespread error. If the rig is sitting on your stomach, it is fighting your belt and fighting your hips. Move it up.
Overloading the front panel is the second most common problem. Double-stacking pouches raises your profile and makes prone shooting uncomfortable and awkward. Carry what you need. Leave the rest.
Ignoring platform compatibility leads to retention problems and fumbled reloads. Match your pouches to your magazines.
Skipping the IFAK is never justified. Carry medical gear.
Building your rig based on how it looks online rather than how it fits your actual use is a mistake that costs time and money. Someone else's setup is not your setup. Build for your body, your mission, and your training environment.
Not training with the rig is the final and arguably most important mistake. The rig should feel familiar before you depend on it. Wear it during dry fire drills. Access your magazines without looking. Open your IFAK in the dark. The goal is to make every movement automatic so that when the situation demands it, the gear does not slow you down.

Train With Your Kit
Gear only works if you have put in the repetitions with it. This applies to a chest rig the same way it applies to a concealed carry setup or any other piece of equipment you might depend on.
Run your reloads. Practice accessing every pouch without looking. If you run a setup long enough, reaching for a magazine or opening a pouch becomes muscle memory rather than a conscious decision. That is where you want to be.
Your chest rig is only as effective as your preparation with it. The setup matters. The training matters more.